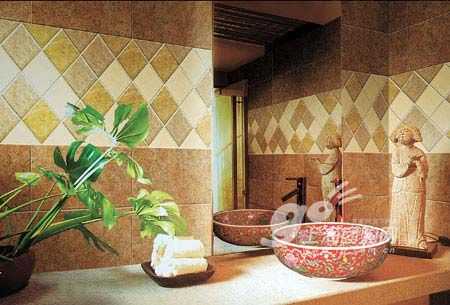
Antique tiles are generally more expensive to sell, and they must be worn repeatedly when paving, because sometimes it doesn't look like regular tiles and needs some tricks. Here are eight steps for everyone to introduce antique tiles:

Brand Shop: Nobel Tiles Regal Home Tiles
The first step: "Identify the plan." Commonly used antique brick paving methods, in addition to the same as the traditional wall tiles in the middle, vertical and horizontal paving method, the antique brick, there are "herringbone", "I-posted", "ramp-shaped Ling "Line" corner brick lining small tile paving, floor tiles with sideline paving, etc., can be described as a variety of paving ways, each with its advantages. Working with designers to choose a suitable way of paving relates to buying, counting, etc., can not be taken lightly.
The second step: "leveling." The so-called leveling means that before paving the antique tiles, the surface of the buildings to be paved should be treated, such as the interior wall surface, exterior wall surface, and the ground, to remove the dirt attached to the surface, and sprinkle water to moisten it, and then mix and level it with cement and sand. , The general use of a gray shovel on the surface of the non-stop application to keep the concrete floor level, wait until the cement and sand mixture is completely dry before paving.
The third step: "bomb line." This line is the use of a long thin line, according to the determined way of laying, online painted with color or white ash, and then in the leveling of the floor to draw the location of antique tiles and brick seam reference line. It's a good idea to use a black line with a carpenter on a board.
The fourth step: "Paving". After doing the above preparations, we must really start the work of tiling, pay attention to whether the construction team's construction methods are detailed, and can greatly reduce the decoration problems that will arise in the future.
The fifth step: "Brick dipping". The matt bricks are soaked in clean water so as not to produce bubbles, so that the tiles can fully absorb moisture and prevent the dry tiles from reabsorbing water after the decoration is finished to cause the deformation of the brick body.
The sixth step: "mixed pulp." The cement mortar should be mixed in a ratio of 1:2. The cement mortar number after mixing should be under 200#. These will be used to smear on the back of the tile.
The seventh step: "spray". Take out the soaked tiles, dry the water stains, spray enough water on the screed, then evenly apply the cement mortar on the back of the brick. The thickness of the mortar is 5~6cm. It is appropriate to thicken the large-size matt bricks. Immediately after the bricks are affixed, gently beat them with a wooden hammer to avoid emptying and level with a ruler at any time.
The eighth step: "dressing". After a certain area is pasted, the joints are used to fill and smooth the brick joints. Finally, the brick surface dirt, such as cement mortar, sewage, stains, etc., shall be removed to strengthen the care.
Link: Home has a curtain Dream teach you how to buy curtains
Tile paving tile entrance decoration cement decoration design window antique brick exterior wall tile tile specification ld tile
Measuring Tape,Rubber Steel Measuring Tape,Mini Tape Measure,Round Fiberglass Tape Measure
Shangqiu Yida Measure Tools Co., Ltd , https://www.hnyidatool.com